

Things start pretty unconventionally in The Legend of Zelda Echoes of Wisdom and it stays that way right the way through the game, so hopefully our walkthrough guide comes in handy. At the start of the game you control Link at full strength, but as you’ve probably seen from the trailers, this is not the way things go for long.
You can follow us on Twitter to get our take on the latest video games releases, and you can see more on The Legend of Zelda series with the official Nintendo Twitter page at https://twitter.com/NintendoAmerica.
AdvertisementHow to escape Hyrule Castle Dungeons?
When you begin in The Legend of Zelda Echoes of Wisdom, you shouldn’t have any issues with the first few enemies, because of the OP nature of Link at this stage. However, if you want to see how to take them out quickly you can watch the video below.
After you get past the enemies, this leads to the first boss fight of the game with a dark version of Ganon to fight. With Link being so powerful, it’s just a case of dodging his attacks and blasting him with your sword attacks. Cycle, rinse, repeat a few times and you should be able to beat him without too many issues. Again, you can see all of the action in the video above.
RELATED:
What will be the next Zelda game?
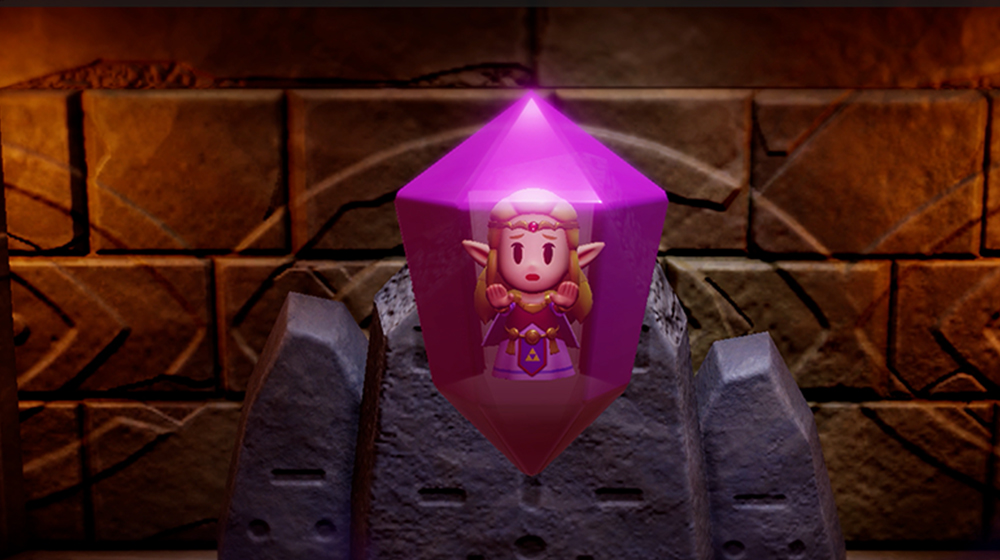
However, as he sinks through the stone floor he opens up a rift and drags Link through. In a last-minute move of desperation, Link manages to fire off an arrow at the crystal surrounding Zelda, who was being held captive by the Ganon boss. This is enough for her to break out as Link is lodt to the rift and suddenly there’s a shift to controlling Zelda for the first time in a main line Legend of game.
From here, the rift starts to expand, so you need to run away to stay away from it. After a short chase sequence you’ll find yourself outside overlooking Hyrule Castle and some guards will escort you to safety. Sadly, its short-lived as the King and his aids have been compromised, so Zelda gets slung into the dungeons beneath the castle.
AdvertisementWith the Tri Rod’s echo power you get from Tri, you’ll have everything that you need to escape, so start by copying the table with Zr. With this you can then create a table up on the ledge to the left with Y and jump over into the next cell.
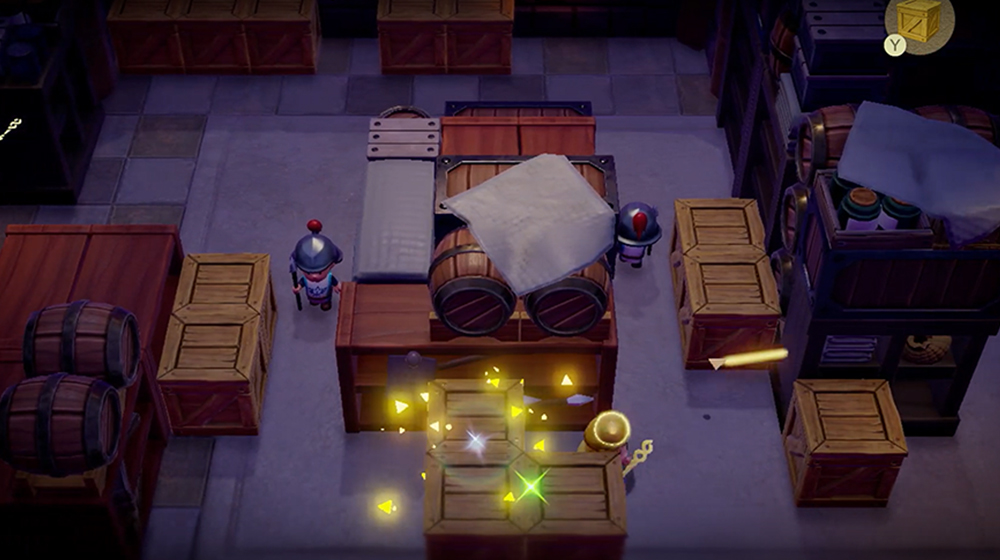
You’ll then take the door outside the cells to the left, which leads to a guarded area. You can’t let the guards see you, so you’ll need to use stealth. You can get up on the shelves by creating a table stairway up to them and then you can bypass the guards below. Next, copy the wooden boxes and use them to block the next set of guards from seeing you, which you can see in the image below.
The first guard will get baffled and the second will follow, so just wait for you moment. When there’s a gap you can run on through to the next section without them seeing you.
RELATED:
What to do first in The Legend of Zelda Tears of the Kingdom
This will see you through to a ladder and you’ll have pots to copy up on the high shelf. With this, you can throw one to distract the first guard to get past him and repeat the trick with the second further to the left.
This leads to a brief chat with Impa, who stays to keep the rest of the guards occupied, while you escape up the stairs. However, this leads to another section with a tree to copy with the Tri Rod. Use this to cross the gap and copy the bed to make bridges and stairs up to the exit. If you’re unsure about any of this you can follow along with the video below.
Outside, you can take the well down and swim around to pick up the rupees and get back to dry land. Copy the boulder and then push it into the water. Swim across and echo a crate to climb out on the other side. Echo a boulder on the crates blocking the way to make them sink and swim through, up and out.
You’ll then need to run to escape the growing rift. Just keep running away from it and you’ll come out in a cave. Copy the rock and head out into Suthorn Beach. You can pick up and throw rocks at enemies to get past them. Remember to copy their echoes to use throughout the rest of The Legend of Zelda Echoes of Wisdom.
AdvertisementHead to the right and pick up the chest high above on the way. A table and plant combination should get you high enough. When you come to some water, you can get up to the piece of heart container by making a bed bridge. You can do the same thing to get up to the exit guarded by sea urchins, which you can clear with some rock throws.
RELATED:
The Legend of Zelda Tears of the Kingdom bosses
Inside the 2D section, you can use urchins to defeat the Keese and drop boulders from above to break the crates to get to the heart container piece below. Climb up and around, take out the Chuchu with Sea Urchin echoes and take the exit.
This will bring you out in the Suthorn Forest, so continue with Part 2 of our walkthrough guide to The Legend of Zelda Echoes of Wisdom. It also includes a full walkthrough for the first dungeon of the game, Suthorn Ruins, so it’s a good primer for the rest of your playthrough.
You can also see our computer games section for more news and features on TotK, or visit The Legend of Zelda website at https://www.zelda.com/.
